

Scheduled exports allow you to automatically send a Report to someone’s email. They can go to any email address, so recipients do not need to be users or admins in Copper to receive them!
In this article, we will cover:
You’ll need to be a Copper Admin to set up, edit, or delete scheduled exports.
Let’s get started!
Note: This feature is part of Reports, which is available on our Professional and Business plans.
If you’re new to using Reports, we recommend checking out our introductory Reports guide.
What are scheduled exports?
Scheduled exports automatically email a PDF copy of a Dashboard on a regular schedule. You can:
- Send it to yourself, to other Copper users, or even to non-Copper users,
- Attach additional Insights (CSV or XLSX format) to the scheduled email export, and
- Specify the frequency, time, and start date of those scheduled exports.
You can also delete or edit the scheduled export afterwords.
Setting up a scheduled export
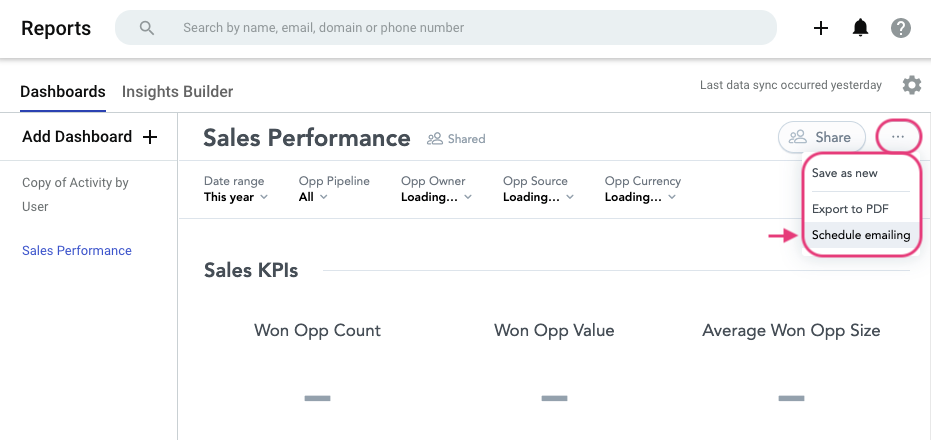
In the Copper web app, go to Reports and open up a Dashboard. In the top right corner, you’ll see a “...” icon. Click it and select “Schedule emailing.”
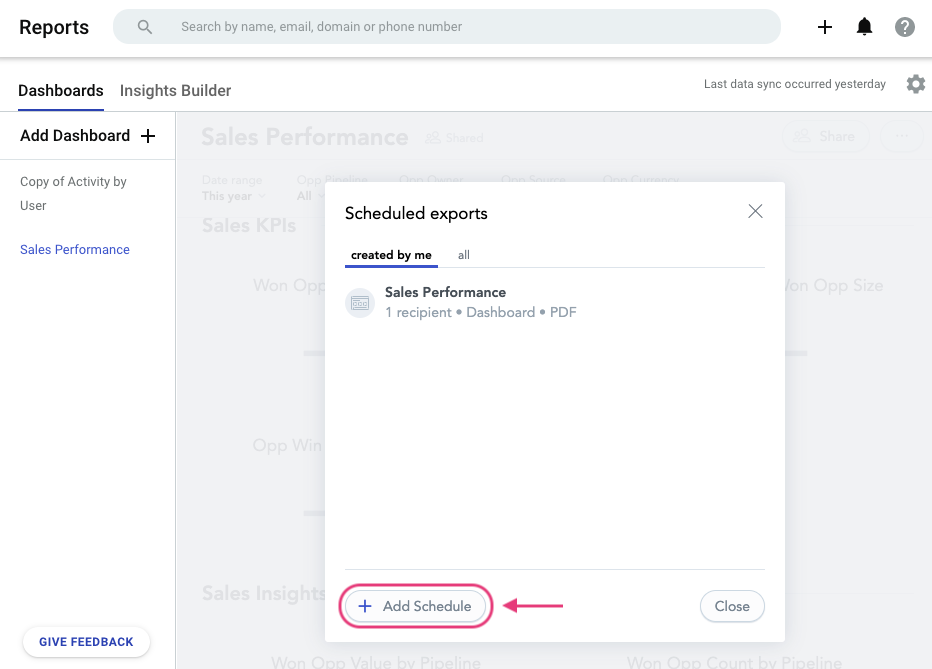
A box will appear showing all the existing scheduled exports. Click the “+ Add Schedule” button.
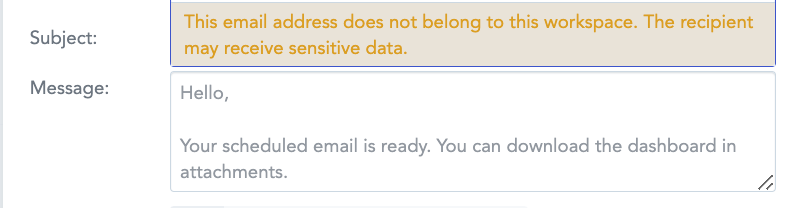
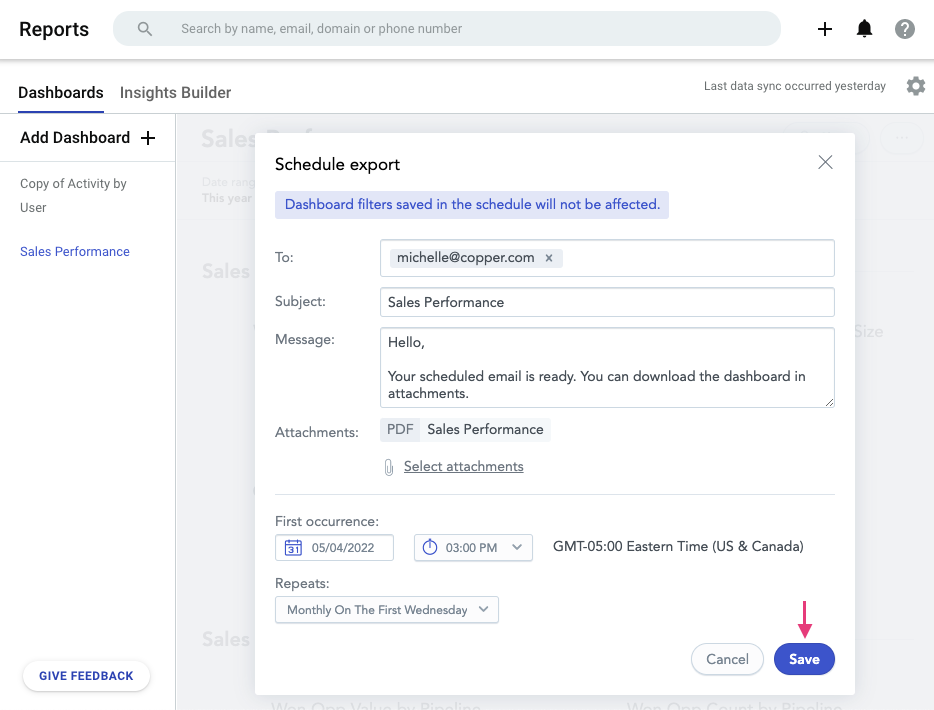
Edit the recipients, email subject and body, attachments, and sending frequency. Then click “Schedule.”

Each export email will contain an Unsubscribe link so your recipients can remove themselves from that sending schedule if needed.
Note: you’ll be listed as a recipient the first time you set up a scheduled email export. You can always remove yourself afterward if needed.
Editing scheduled exports
To edit an existing scheduled export, go to Reports > “...” button > Schedule emailing and click one of the existing scheduled exports.
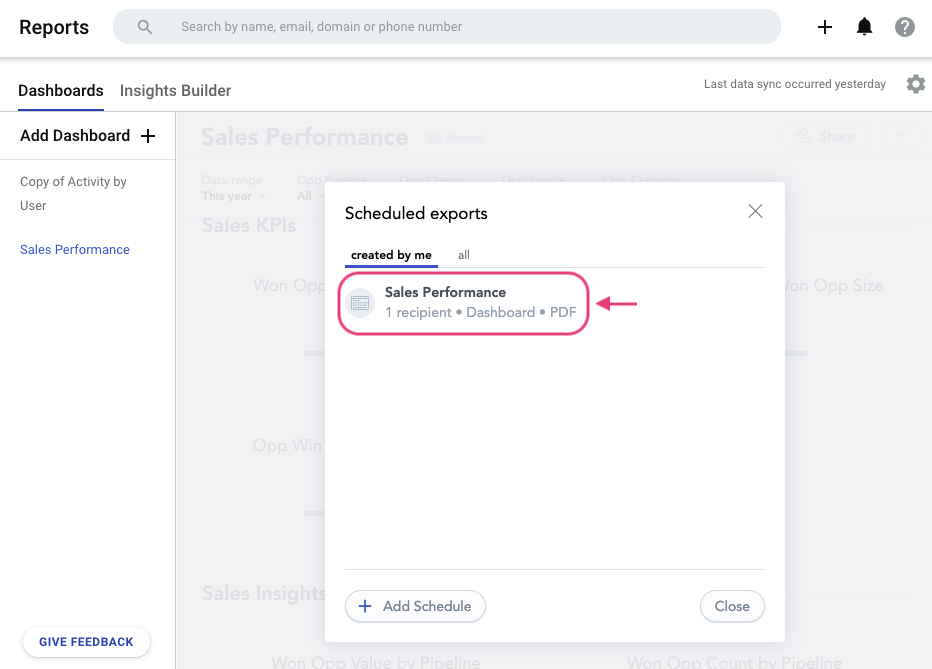
Make your changes and then hit “Save.”
Deleting a scheduled export
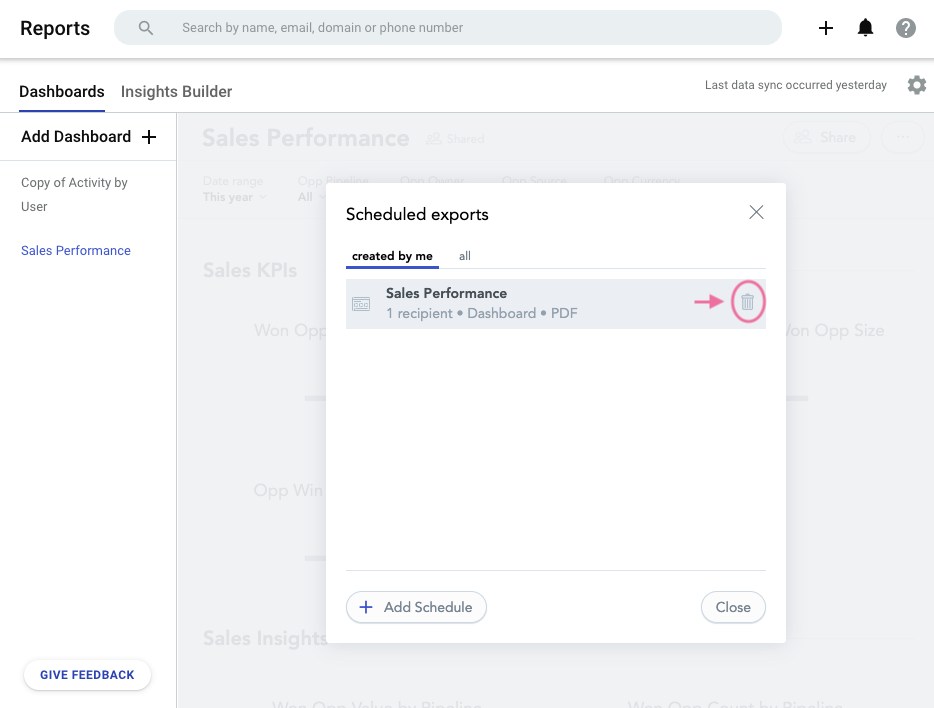
To delete an existing scheduled export, go to Reports > “...” button > Schedule emailing and hover over one of the existing scheduled exports. You’ll see a garbage can icon - click it to delete that scheduled export.
Best practices
Scheduled exports are super easy to set up, but we also recommend you follow these general guidelines:
- Double-check your recipient list - there’s no way to un-send an email export once it’s out, so make sure you have the correct recipients listed.
- Keep your recipients informed - make sure they know when a scheduled export has been set up! This way they’ll understand where it’s coming from and that it’s not spam or a phishing attempt.
- Less is more - it’s tempting to set up a whole bunch of scheduled exports, but don’t go overboard! You might overwhelm your recipients.
- Add details to the email - include information such as who made the Report and what kind of tables or charts it includes.
Got questions?
Feel free to leave them as a comment below or post in our Community forum!