

![Custom fields: customization & best practices [video]](https://uploads-us-west-2.insided.com/copper-en/attachment/7a36b8e3-3b90-4ddd-b25b-a89df0f15c2a_thumb.png)

This tutorial builds off of the foundation laid out in Understanding Copper Record Types.
Once you have an understanding of the different record types and which record types will be key to your Copper workflow, the next step is to ensure you are capturing all of the information you need for each Record Type in Copper.
Customizing Fields in Copper allow you to successfully capture all of the information you need for your contacts and Opportunities. This tutorial will provide you a framework to setting your Fields on Records.
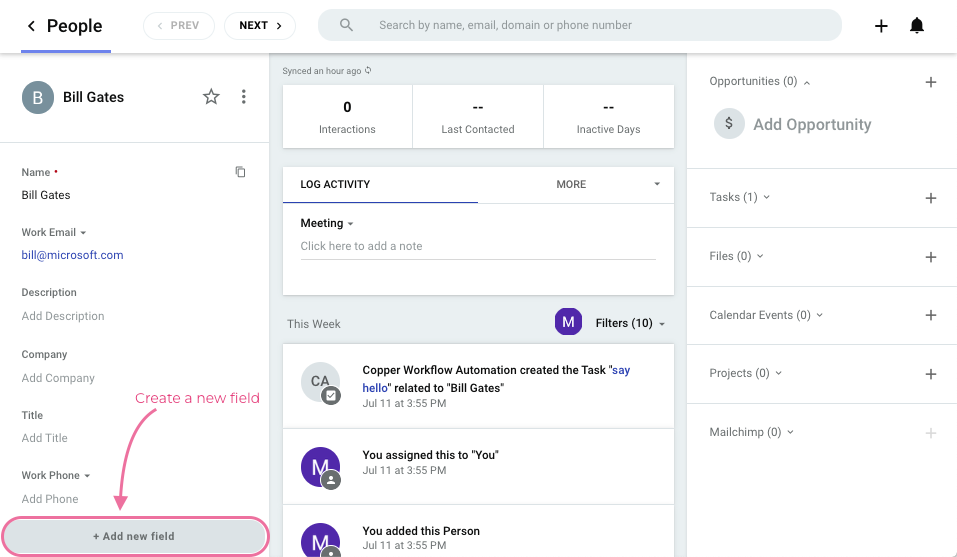
The easiest way to add a custom field is from your record view in the Copper web app or Chrome extension.
For more details and best practices, check out the video below:
Tutorial: Understanding Copper Record Types
0:00: Introduction
1:37: Where to apply customizations
2:35: Step 1 - Managing Default Fields
3:33: Step 2 - Creating Custom Fields
7:55: Step 3 - Organizing Fields on Records
10:20: Person Record Example
Note: As of March 2022, Opportunities in the Copper left-hand menu is changing to Pipelines. Click here for more information.
Out of the box, Copper has a set of default fields. Building off of the default fields is a key element of customizing Copper.
To begin customizing your Fields on Records navigate to Settings > Customize > Manage Fields on Records. Note, you’ll need to be an admin to access this area.
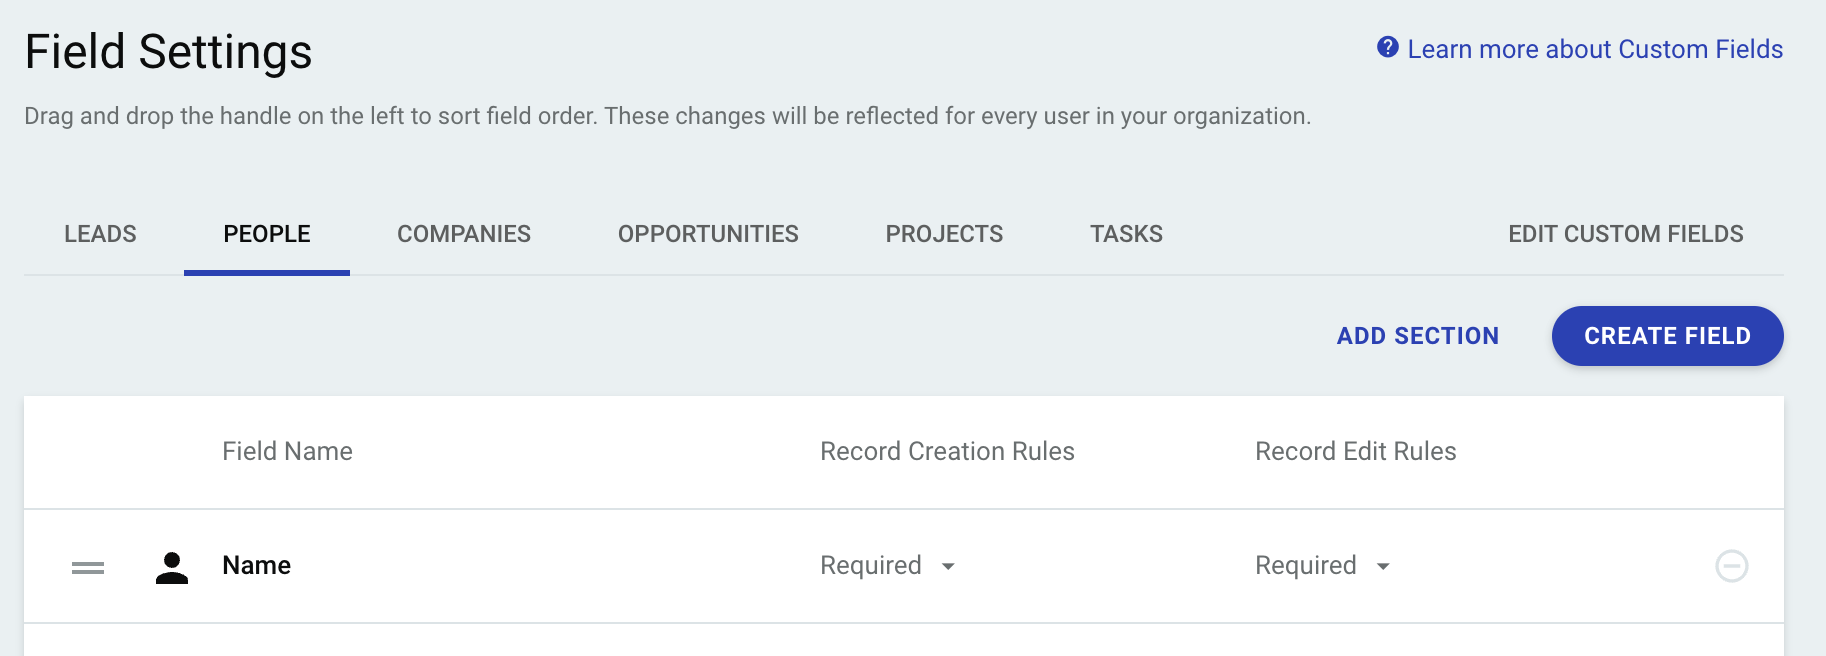
Customizing fields on records:
- Review the default fields for the record type. Then, remove or rearrange fields that are not relevant to your workflow.
- Create custom fields to capture any additional information your business captures for the record type.
- Rearrange and group your fields so that key information is grouped together in sections and ordered correctly.
- Repeat for each record type you’ll be using in Copper.
TIP: If you apply the same custom field on two separate record types, they will need to be filled in separately.
Converting leads are the one exception to this rule. When a Lead is converted the data will transfer over to the corresponding field for example ‘Value’ field on a Lead will fill in ‘Value’ field on the Opportunity when converted.
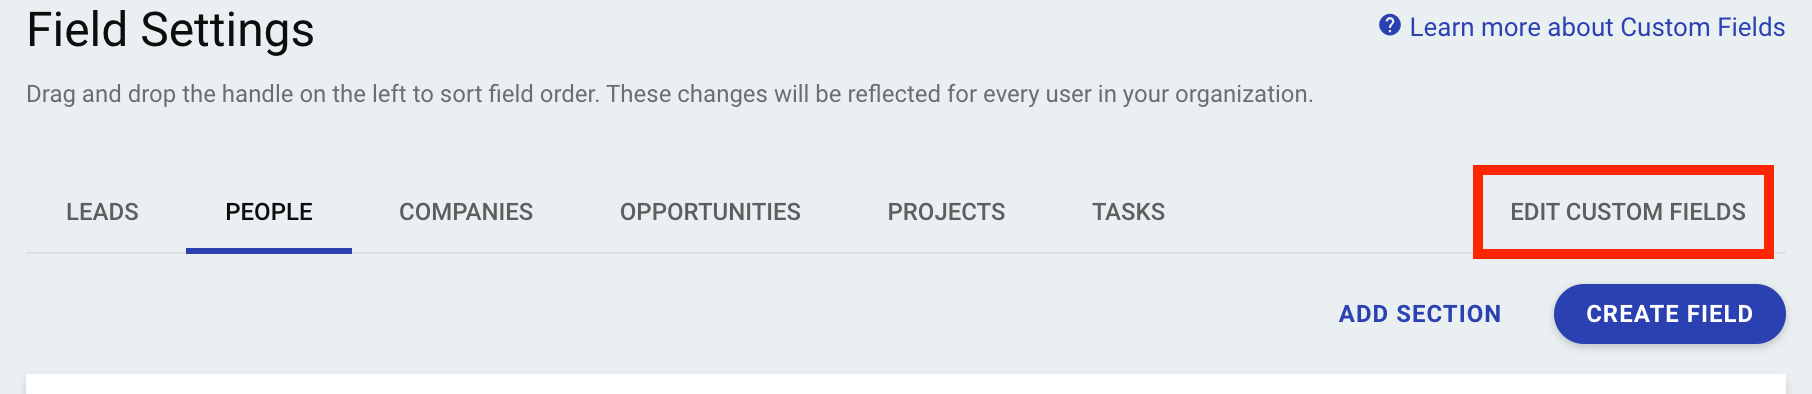
How to edit your Custom Fields
To edit your existing Custom Fields once created, navigate to Settings > Customize > Manage Fields on Records > Edit Custom Fields.
Here is a list of changes you can make to custom fields:
- Change the location or duplicate the field to another Record Type
- Adjust the Label or Field Key; this is only relevant for building Workflow Automations
- Adjust the field specific options (such as dropdown options)
Let us know in the comments if you found this guide helpful!